
Pleasant Gehman's Blog
July 18, 2017
TAKE IT OFF! A GUIDE TO REMOVING STAGE MAKEUP FROM YOUR FACE, BODY AND COSTUMES
 Tons and tons of stage makeup...and it's gotta come off somehow! photo: Maharet Hughes
Ah, stage makeup: where would we dancers be without it?
By using careful camouflage and strategically placed contouring, we can make our features look larger, smaller or way more dramatic. We become wide-eyed, pillow-lipped seductresses with chiseled cheekbones and jaw-lines. We morph into Pirate Wenches, Dying Swans, Roaring Twenties Flappers and mid-century Pin Up Girls. With the addition of metallic powders, glitter and crystals, we turn into Fairy Queens and Every Goddess From Every Pantheon Ever.
Stage makeup looks gorgeous when you’re under the lights… and totally damn scary when you’re on your way to or from a gig, making a pit stop at a convenience store or fast food joint! And once you’re home, taking it off seems like such an incredible chore.
Seriously, there’s almost nothing worse than waking up with some of last night’s Stage Face still on, is there? The pearly, highly pigmented turquoise eye shadow has turned into bright blue eye-boogers and you’ve got adhesive marks on your cheeks where brilliant rhinestones once twinkled. The fire engine red glitter you applied so carefully to your crimson lips migrated while you were in The Land Of Nod… and now the lower half of your face looks like it’s broken out in a case of sparkly smallpox.
Applying stage makeup is fun and gratifying, but sadly, most of us don’t know the best ways to get it off. Learning to take it off properly isn’t nearly as much fun…but your skin (and sometimes, your costumes and/or street clothes) will thank you for it!
Here’s a quick ‘n’dirty guide to cleaning up and taking off anything related to stage makeup:
Adhesives: Almost any type of adhesive can usually be removed from the skin without scrubbingif you use oil. Most oils will dissolve the adhesives (or tape marks from fashion or toupee tape) very gently from the face or body, including coconut, olive, jojoba, or almond oil. Saturate a cotton ball or pad with the oil, apply to your skin and let it sit for 30-45 seconds, and the adhesive usually comes off with one sweep. Use a second saturated pad if you don’t get all of it removed with the first swipe. For larger area of skin-on the body, not the face- baby oil works super well, too. It’s best to avoid using on the face, because it can make the delicate skin there prone to break outs…and that, nobody needs!
If the adhesive you were using were Spirit Gum (Mineral Spirits) regular oil might not cut it, so it’d be a prudent idea to invest in some adhesive remover from a beauty supply or theatrical store.
Fake Blood:Though it looks gory on stage, fake blood is usually easy to get off skin. Just give it a few swipes with a make up wipe or even a baby wipe. If this doesn’t work, a few squirts of shaving cream usually lift the discoloration immediately. Just be careful if you’re using menthol shaving cream around your eyes!
False Eyelash Glue Buildup: All the gunk from the lash glue builds up on your faux lashes, and it not only makes them difficult to apply, it’s a germ magnet, too! Cleaning off your falsies is pretty easy, though. Hold the last in one hand, from the edge, and pick the excess, dried up gunk off the band of the lash with a tweezers. It often comes off in a strip! If it only lifts off part way, just repeat the process til the lash band is clean and visible. Dip a Q-tip into alcohol, and swipe it across the band a couple of times to sterilize it…but make sure you let the lash dry for a minute or so before applying it to your eye!
Glitter: The best way to remove glitter that has migrated is to use tape. This is especially great if you’re doing a couple of numbers in a show, and need to do a quick clean up, cause using lotion or a makeup wipe usually just spreads the glitter around- I always keep a roll of tape in my gig bag!
Any kind of tape works, from plain old Scotch tape to packing tape…. I’ve even used duck tape, though it gives new meaning to the term exfoliation! All you do is roll a piece of tape into a loop, and press it gently against the area you want to clean. The glitter comes right up off your skin. This trick even works for areas where the sparkles are concentrated, like glitter lips, though you’ll have to go over the area a few times.
Hair Dye Stains On The Skin: This is gonna sound gross, but it works like a charm! Mix up a paste of cigarette ashes and water, the thicker the better. Apply to the hairline, (wherever the dye dripped) with a Q-tip, rub it in and leave it on a minute or two. Rinse it off by wiping with a warm, soapy paper towel or washcloth, finish by splashing water on the area. Remember, in the olden days, they made soap with tallow and ashes- they’re a potent stain remover. If you don’t smoke or the ashes are yucky to you, do the shaving cream trick mentioned above. You can also try using rubbing alcohol, but it’s very drying to the skin, and there’ll be scrubbing involved, so be sure to moisturize right after.
Makeup Stains On Fabric: Try as we might, even if we’re very careful, our stage make up sometimes transfers to our costumes or accessories. If you get foundation or lipstick on a “fancy” fabric, like brocade, raw silk, velvet or satin, you’re best bet is to take it to a dry cleaner- believe me, they deal with these types of stains all the time! However, if your make up rubs off on anything washable- such as a lycra blend, a cotton or cotton poly blend, or synthetic chiffon ( hellooo? Skirts, veils and scarves) you can get it out yourself. I’ve even lifted foundation and lipstick stains from 100% silk veils and skirts- but you must be sure to do a spot-test first, to make sure the fabric dye itself is stable. All you need to remove make up is any or all of the following: Dawn Dishwashing Liquid, or baby shampoo, rubbing alcohol, and a commercial stain remover. My favorite is Shout Advanced Action Gel, but seriously, almost all of them work.
After you’ve done your test on an inside seam or the tiniest corner of a hem and discerned that the material you’re cleaning won’t lose it’s color, get started.
Treat the stain by spraying the Shout or whatever product you’re using directly onto it. Apply a generous amount, and let it sit anywhere from the recommended five minutes to fifteen or twenty. Usually, even with the product still wet on the fabric, if the stain looks like it isn’t there, then the stain remover has done its job. If you can still see a bit of the stain, apply a little more of the stain remover. Or, you can pour a few capfuls of the rubbing alcohol directly on to the area. Either way works. Next, fill up the sink or your tub with lukewarm water- and err on the cooler side, because hot water actually sets stains! Add a few squirts of Dawn or the baby shampoo while the water is running. Place the garment in the water and swish it around gently for a couple of minutes. Drain the water, lightly squeeze the excess soapy water of the garment you’re washing, and refill the basin or tub again. Repeat this step a couple of more times til all the soap and cleaning products are gone, and gently squeeze the clean water from your costume. Hang to dry or lay it flat- your choice, but do not let it dry in direct sunlight- it’s the heat thing again. If any of the stain is still visible after your costume dries, repeat the process again, and the second time should eradicate all of the stain.
Liquid Latex:Sounds crazy, but most liquid latex comes off the skin easily and with hardly any scrubbing by using plain old soap and water. If you get a few patches where the latex went on heavily, dab with a bit of oil, then wash with soap and water once more.
One last word to the wise: I always have a small Backstage Emergency Kit in my gig bag that has a needle and thread, safety pins, bobby pins and much of the afore -mentioned materials: a roll of scotch tape (or even a lint roller) a travel sized pack of make up wipes and/or baby wipes, a box of Q-tips, a stain stick and a tiny spray bottle/mister with rubbing alcohol.
#
If ya want to learn how to get stage makeup ON before you take it off, purchase my “Bombshell: Dramatic MakeUp For The Stage, Photos & Glamorous Occasions” here:
http://www.princessfarhana.com/shop.htm
 Bombshell: Dramatic Makeup DVD with Princess Farhana and DeVilla photo: Dusti Cunningham
Come say hi to me on the Inter-Webs!
www.princessfarhana.com
www.pleasantgehman.com
www.facebook.com/pleasant.gehman
www.facebook.com/princess.farhana
www.twitter.com/PrincessFarhana
www.instagram.com/princessofhollywood
www.pleasantgehman.com
www.facebook.com/pleasant.gehman


May 7, 2017
HEALTHY BODY, HEALTHY DANCER: THE BENEFITS OF GOLDEN MILK
 Photo: Maharet Hughes
Golden milk, sometimes called called turmeric tea, is hugely popular these days. There’s definitely a reason- actually, there are several- that it’s all the rage among Paleo Diet devotees and really, anyone whose into self care and looking after their wellbeing.
The health benefits of turmeric,which, along with coconut milk, is the main ingredient in golden milk are numerous. Among other things, it’s active compound curcumin is a powerful inflammation fighter, and that’s what makes this four thousand year old concoction relevant to…well, everyone… but especially to dancers!
We live our lives constantly inflamed from traumatic or overuse injuries- hell, even the zits we get from our stage make up are caused by inflammation!
Additionally, golden milk-and it’s chief ingredient, turmeric- boosts the immune system, improves memory and brain function (hello-that new choreography you’re learning?) promotes digestive health, and have several cancer-busting properties. Not only that, it’s supposed to lower your blood pressure, it’s a liver detoxifier and an antioxidant…and makes your skin look amazing.
It's also relaxing and quite filling, the perfect post-gig drink.
There are several recipes for this divine warm drink floating around the internet, but here’s my take on it.
This recipe is easy doubled and will last quite a few days in the fridge- just heat it up well before drinking.
1 cup unsweetened coconut milk, almond milk or a mix of both
1 large cinnamon stick, or powdered cinnamon to taste
1 tablespoon coconut oil
1 tablespoon honey (less or more to taste)
½ tea spoon dried turmeric (or if you’re me, a heaping table spoon full)
6 or 7 paper-thin slices of fresh ginger
4-6 whole peppercorns ( hey boost the potency and efficiency of the turmeric)
1 cup water
Toss all the ingredients into a saucepan, and bring the mixture to a low, slow boil before turning down the heat and simmering for 10 minutes. Stir well, don’t let it burn.
Strain the liquid through a sieve to exclude the peppercorns and ginger- or not! I don’t mind the pepper ( and have even been known to add in red pepper, too) and love the ginger slices floating around.
Enjoy!
#
I’m teaching and performing at June 2-4, 2017 Cairo Shimmy Quake Belly Dance FestivalJune 2-4, 2017 Glendale, CAGlendale Civic Auditorium1401 N. Verdugo, Glendale, CA 91208Info: http://www.cairoshimmyquake.com/

Come say hi to me on the inter-webs!
www.princessfarhana.com
www.princessraqs.blogspot.com
www.facebook.com/pleasant.gehman
www.facebook.com/princess.farhana
www.twitter.com/PrincessFarhana
April 30, 2017
IF ONLY THEY KNEW: A BELLY DANCER'S INTERNAL DIALOG DURING A SHOW
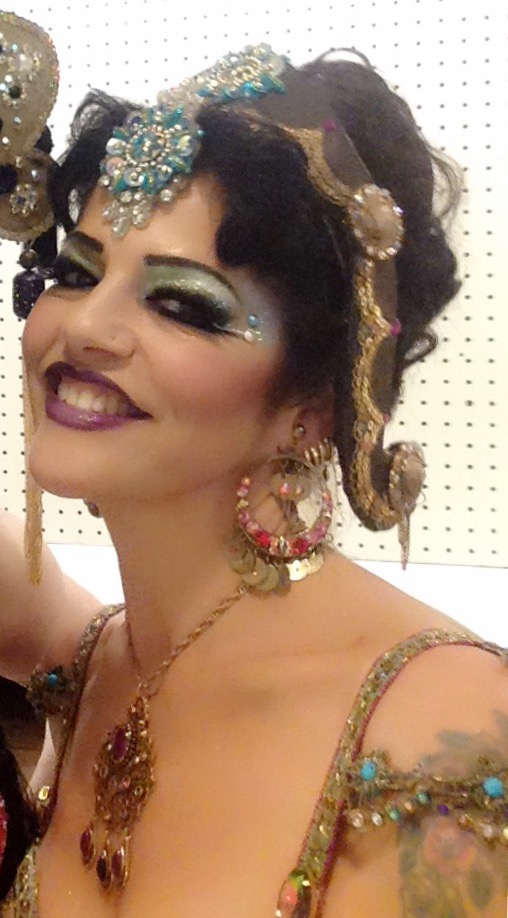
 On-duty at my regular restaurant gig
Restaurant gigs are one of the primary jobs for many belly dancers. They can be very lucrative, and they’re usually lots of fun because the dancer gets to interact with the customers up close and personal.
However, while we sometimes are completely in the moment and being transported by the music, there’s also a litany of “dancer problems” that go hand-in-hand with these intimate shows, which are often done in very small spaces, with no stage, dancing among the tables.
I’ve been dancing at restaurants for twenty-seven years…and that pretty much qualifies me as having seen (and heard) it all… or at least pretty close to it!
While the general public is getting a beautiful floor show, the scenario in the performer’s mind- masked by a dazzling stage smile- is often quitedifferent than what the audience is experiencing.
Here are some of the thoughts running through my head at various times during restaurant sets.
Can you relate?
1. Please don’t even entertain the notion of tipping me with your greasy hummus fingers!
2. Humiliating the birthday boy or girl is not in my job description.
3. Holy crap, this song’s almost over- how the hell did that happen?
4.Yeah, uptight-lady-hanging-on-tightly- to-your man, it’s sad but true: the only real reason I’m dancing here is because I want to seduce your fat, balding husband… who by the way, has zero table manners.
5.Please God, don’t let me get my period.
6.Why does this veil feel so heavy tonight? It’s just a piece of silk!
7. If that waiter crosses in front of me one more time to refill water glasses, I’m gonna cut a bitch!
8. Sorry dude, but your business card doesn’t count as a tip.
9. Surprise! I speak English- and even though you seem to be an authority on this insane theory you’re espousing so loudly, I didn’t get any ribs removed to be able to dance this way.
10. Not taking my top off. It just ain’t gonna happen.
11. I saw a zero on that bill- please let it be a fifty-oh please, oh please, oh please.
12. I hope the audience can’t tell that my foot is bleeding like a stuck pig from that glass I just stepped on.
13. While I appreciate your concern, would you please quit yelling about-and pointing to-the dollar that fell on the floor?This isn’t an isolated incident… it’s happened….oh, a couple of times before.
14. Can you keep your toddlers under control?
15. Can you keep your pubescent son and his testosterone-infused teenage pals under control?
16. Can you keep your absolutely shit-faced party guests under control?
I7. I you try to offer me a tip that’s held in your teeth, I will pat you on the head like a dog. I might even go “woof woof” to see if you respond in kind.
18. I got you up to dance cause it seemed like it would be fun…for a minute or so! Do you think you could possibly manage to sit down before my shift is over? No? Well then how about before I retire from my dance career?
19. Please God, don’t let me sneeze into these nice people’s dinner.
20. You aren’t “offending" me by offering a tip. If you knew how much this costume cost you’d probably puke up your baba ganoush right on the table!
21. Contrary to popular belief, a one dollar bill from a party of fifteen-plus diners is not a great tip. Save it for the valet- he’ll be only slightly less horrified than I am.
22. Oh no… I think my right eyelash is about to fall off!
23. Where in the actual fuck did you get the idea that “most belly dancers are fat and have mustaches”?
24. Do. Not. Try. To. Poke. My. Belly. Button.
25. I hope still I have some Chardonnay left at home…
#
Come say hi to me on the Inter-Webs !
www.princessfarhana.com
www.pleasantgehman.com
www.facebook.com/pleasant.gehman
www.facebook.com/princess.farhana
www.twitter.com/PrincessFarhana
www.instagram.com/princessofhollywood
January 11, 2017
WINTER HEALTH AND BEAUTY FOR DANCERS
 Winter beauty and health for dancers
Is that a shimmy or are you just shivering?
Winter has hit in LA, and I’m freezing! I’m also reasonably sure that all you dancers in colder climates are laughing hysterically at me, but it really is winter here in Hollywood. We’ve had cold storms non-stop the past month, and more rain than in the past six years of drought!
But no matter where you live, there are some things about our dance practice and presentation that really need to change when the seasons do. And if you haven’t addressed any of this yet, there’s still plenty of time to! So here’s some winter beauty tips for you...no matter what climate you're dancing in...
SKINDuring the winter, our skin gets dry from the cold and wind and also from indoor heating. The extremes of temperature make our skin flakey and dull…and trust me, nobody wants to see that on stage.
About once or twice a week, I use a scrub to exfoliate my face. There are tons of products you can buy, but an easy and totally inexpensive home made scrub will do the trick, without causing irritation. Here’s all you need to do:
In a bowl, combine 1 tablespoon of dry oatmeal with ¼ teaspoon of table salt- any kind will do. Add a teaspoon of water , or if your skin is very dry, use olive oil instead. Rub it into your skin carefully and gently with your fingers in circular motions, going upwards. Make sure not to drag or pull your skin. Then let the paste sit on your face for about ten minutes, and rinse it off with tepid water.
After this scrub, I apply natural coconut oil to my face. You can purchase a large bottle of coconut oil at any health food store- it’s great for cooking too. But when used on the skin, it acts as a humectant, drawing moisture to you and sealing it in, without leaving you feeling greasy and gross…plus it smells nice. I slather it all over my poor beat up feet at night, then slip on a pair of thick socks and I the morning, my feet look…well… almost presentable! It’s also terrific as a natural make up remover.
Moisturizing is necessary, even more than it is in warmer months. As for facial moisturizers, I love Boots Protect And Perfect Intense Serum- I use it at night, it seeps right in and my skin feels so soft every morning. For daytime, I use Olay Total Effects 7 In One Daily Moisturizer,which is really creamy but not oily…it feels light and is great under make up. There are tons of products you can buy, but an easy ( and cheap!) home made scrub will do the trick, too.
COSMETICSAs for winter make up, one of the problems most of us have is that our summer tans are fading. Check the foundation you’ve been using to be sure that the shade still matches your skin tone. You might want to mix two colors together, so you can lighten or darken the current color you are using to match your “new” seasonal skin tone. For pale or fair gals, bronzer might be in order…and you can find great, inexpensive ones at the drug store! E.L.F Studio Contouring Blush And Bronze is only about four bucks and comes in a wide variety of shades. If you want to go a little higher-end, MAC Bronzing Powder is the bomb. For bronzers, make sure to use them sparingly, since you are no loner tan; take a large fluffy brush , and lightly go over the outside contours of your face: cheek bones, temples, jaw line, then fluff some across the bridge of your nose. This will give you a healthy and subtle sun-kissed glow, and extend the remnants of your summer color.
If your hair is looking dull and dirty, but it’s too damn cold to wash it as much as you do when it’s warmer, try a dry shampoo. Aveeno Pure Renewal Dry Shampooworks like a charm and is available at places like target, Walmart, CVS, etc. for under ten bucks. Also, in the winter, static electricity is a problem for any type of hair, so think about using a silicone smoother to prevent fly-aways. I really like the John Frieda Collection Frizz-Ease Hair Serum but be forewarned- a little dab’ll do ya!
BODYDuring the cooler months, be really careful about making sure your body is fully warmed up before you dance. You should be doing this anyway, but in the winter, it’s absolutely imperative, because dancing with cold muscles is basically a way of begging for an injury!
Be sure to dress for class or rehearsals in “classic dancer layers”- including a substantial sweater or sweatshirt, leg warmers, closed dance shoes with socks, that sort of thing.
Make sure the your bedroom is warm enough at night. If it's chilly where we sleep, that could lead to curling up int weird positions... which will directly lead to stuff muscles and sore joints!
During the winter, gals have to be really on top of our vitamin Dintake. Adequate amounts of vitamin D will help your body to perform to it’s fullest- it’s great for our bones and it boosts the immune system…and of course, we need that for dancing! Vitamin D also keeps our mood up, and increases morale.
During the spring and summer, get a lot of vitamin D naturally from sunlight, but during the winter, because of the longer nights and lesser amount of daylight hours, it’s a safe bet our D levels are decreased.
If you’re not already taking vitamin D supplements, make sure to ask your doctor which dose is best for you
Stay warm and cozy, dancers!
#
I'm available for Skype lessons all winter long! Book a Skype class with me here:
http://www.princessfarhana.com/classes.htm

September 20, 2016
TEN HABITS OF SUCCESSFUL DANCERS
How many times have you shared a dressing room or studio space with a dancer who was a total train wreck? Every other dancer in the place just sort of backs up and watches in horror as the crazy person -who, of course has shown up late- digs frantically in a suitcase scattering it’s contents all over, yells loudly on a cell phone, or has a complete meltdown.
We’ve all witnessed that, right?
Baby dancers can be excused (ok, once or twice) because they haven’t learned the ropes yet and don’t have the experience -or guidance to know exactly what’s up. But ironically, it’s all too common that the disorganized, noisy and entitled nutcase is a seasoned pro…and sometimes it’s even the featured artist!
There’s a big difference between bumbling your way hit’n’miss through gigs and being a true professional. Even though most of us already know (and practice) the points I’m about to mention, they’re worth re-visiting; they’ll help you to have a long, healthy and prosperous career.
Here are ten habits of successful dancers:
Make Health A Priority This one seems like a total no-brainer, but many of us blithely ignore it. It’s obvious that we can’t perform to the best of our abilities by running on fumes. Many dancers (self included, by the way) routinely function on insufficient sleep and “meals” that consist of a power bar and a handful of nuts… or by pigging out during post-gig fast food parties. And what about ignoring injuries, preferring to dance while in pain rather than sitting a few shows out? Raise your hand if you’ve been there- we’ve all done it.
Needless to say, we’re only given one body per lifetime. Taking care of yourself is vital if you want a long, healthy career. So rest up, eat clean, take your vitamins, and see a doctor when you need to, and know the world –or your career- won’t end if you miss some time due to an injury.
Be Dependable Be impeccable with your word. If you confirmed a gig, you gotta be there…and you need to show up on time. If you’re running late, call or text. If you know in advance can’t make a gig or if a sudden emergency comes up, let the show producer or venue owner know immediately. Suggest a substitute, and share their info or offer to contact the sub yourself.
Manage Time Wisely There’s damn few dancers who have managers, publicists and booking agents, so if you want a successful career, you’re going to have to handle all of this stuff by your lonesome. That means that even if you’d prefer being onstage or in the studio, someone’s gotta do the administrative work…and that someone isyou. This includes everything from making lesson plans for your classes to promoting your gigs, from updating your website to booking shows, travel and studio time. There are only so many hours in a day, but it’s crucial to carve out some time to take care of business, it’s necessary. Set aside an hour or two a week just for administrative work, and you’ll probably notice a huge difference in your career.
Be Organized This actually relates to the previous point, because good organizational skills will save you time! Keep a pre-packed dance bag to bring to class, whether you’re taking or teaching- that way, you won’t be wasting twenty minutes looking for your ballroom shoes, resistance band, or iPod.
Store your costumes with all the pieces and accessories (jewelry, wigs, shoes) you need for that particular act.
Decide what supplies you need for any gig. Create a master checklist if you need to, and refer to it as you pack.
Focus Keep yourself on your toes physically by mentally envisioning what you want to achieve. Be in the moment; no “phoning in” your dancing at rehearsals, and certainly never onstage or at an audition.
Set Goals Never stop striving for what you want. Set your goals, and make a timeline for what you’d like to achieve. Break down the steps you think it’ll take into bite-sized, do-able chunks, finishing each task before starting on the next one.
Stay Grounded No matter how talented you are, nobody wants to work with a diva. Entitlement is an ugly trait in anyone, no matter how famous or in demand they are. This old saying might sound a little brutal and cutthroat but it’ll help you remember to stay humble. There’s always someone younger, prettier, more talented, and easier to work with waiting to take your place.
Practice Baby dancers are addicted to practice cause it’s so new and fun. But once we get comfortable and established in our careers, many of us tend ignore home practice, or reviewing the fundamentals by drilling. World famous ballet dancers do their barre exercises every day, and Olympic medalists train like crazy people, also every day. No matter what level you’re at, you are no different- your performances will grow by leaps and bounds if you get back to basics.
Don’t Compare Yourself To Other Dancers This is much easier said than done, because it’s in our nature to compare and contrast. It’s one thing to want to perfect a move because you like the way another dancer does it. But all too often, comparison leads to us beating ourselves up, because we perceive we’re lacking something that another dancer has. Once you realize that every dancer is different and each has individual strong points to offer, it’ll be much easier to stop comparing, and feel comfortable and happy in your own right.
Never Stop Learning There’s alwayssomething to learn. The more you broaden your horizons, the better dancer you’ll become. Learning is a process; it can be active and intentional- as in taking a class in a style you’ve never studied, or it can be passive, like watching another dance’s performance on You Tube. If you’re receptive, you can learn things that will improve your own dance technique even by studying unrelated subjects. Even your beginner students can teach you something relevant. Inspiration and “A-ha moments” can strike at any time. Stay open and be curious.
#

Book a Skype lesson with me on the topic of your choice, privates or small groups. Click here:
http://www.princessfarhana.com/shop.htm
Come say hi to me on the Inter-Webs !
www.princessfarhana.com
www.facebook.com/pleasant.gehman
www.facebook.com/princess.farhana
www.twitter.com/PrincessFarhana
www.instagram.com/princessofhollywood
August 28, 2016
TECHNIQUE TIPS TO IMPROVE TURNS
 Photo by Maharet Hughes
Turns and spins may look effortless on stage, but the components that go into them are many, and sooo much more than just moving through space.
When I first started dancing, turns seemed like an elusive, unreachable goal. I knew nothing about the mechanics involved... and all too often, I found myself in classes where it wasn’t properly broken down, either. It seems that outside of beginning ballet classes, it’s just assumed that dancers already have the foundation technique or innate ability to execute a turn-or series of turns- and that’s simply not true!
To begin with, clean well-executed turns of any kind all start with balance.
Achieving and maintaining the center of gravity in the body is crucial to dance in general, and specifically for turning. This sense of stability activates three different parts of our physical bodies, and they must work together, constantly shifting and adjusting to make up the clean execution of turn technique.
The first is our vestibular system, located in the inner ear. Without getting too scientific, it’s the primary place that controls our ability to move our bodies. The vestibular system sends messages to our brains about kinetics, or the ability to fuse movement with balance. This is why people affected with inner ear problems or an ear infection often experience vertigo or dizziness.
The second is our motor control skills, which govern the interaction between our brains and our muscles, bones and tendons. The motor system sends cognitive information from the central nervous system to our musculoskeletal system, enabling us to perform every day movements and tasks…and to dance.
The third component is the ocular or visual system, which not only allows us to see, but registers depth perception and physical orientation. Of course, the eyes send info to our brains when we dance. It’s important to know that during a turn, unless you’re a crackerjack at spotting, your eyes won’t be fixed on a certain point, putting your equilibrium a little out of whack.
All three of these bodily systems work together as reflexes to aid our proprioception, orthe sense of our physical body in space. A common example of the use of proprioception (or lack of it!) is the field sobriety sobriety test where an offer commands a potential offender to close their eyes while standing on one foot and touching their nose? A sober person can usually do this easily, but someone who is impaired or intoxicated cannot.
Ok, so now that you’ve got a little background, let’s move on to some exercises that will get you turning like a champ.
Develop Your Proprioception In my classes, to demonstrate what proprioceptive orientation is, I ask my students to close their eyes, extend their arms, and stand on one foot for as long as they can. Some can do it for an extended time naturally, while others start to sway and waver… while sober! Proprioception works almost without any visual cues, it’s our body’s sense of “righting” itself. The good news is that by doing exercise better proprioception skills can be developed.
Improve Your Balance Check and see where your weight is by rising slowly up onto the balls of your feet and maintaining the position for as long as you can. Notice where the brunt of the weight is. If it’s on the outside of your foot, towards the small toe, that’s showing a weakness in your ankles. This position is not optimal for turning, and it could potentially injure you. A “classic” Dancer’s Sprain occurs when the foot rolls over onto the outside edge, during dancing or any type of day-to-day activity.
Try this exercise to get your weight placed properly: With feet just under your hips, rise up slowly onto the balls of the foot, pressing your toes into the floor. Keep your weight over the middle of each foot, and a little towards the big toe. Hold this position for at least eight counts, and slowly lower down to the floor. If you need to, use a ballet barre, a chair or even a wall or doorframe to maintain stability. Hold on as lightly as possible, trying to let your body do most of the work. Repeat at least four times, slow and steady.
Another exercise is to stand with the feet hip width apart. Pick up one foot- not too far off the ground- while making sure the foot you’re standing on has equal weight distribution between the ball and the heel. Hold in place for at least thirty seconds, before switching to the other foot. Repeat.
Strengthen And Stabilize Problem Areas Even though we dance constantly, all of us are stronger in certain areas…and those areas over-compensate for where we are weaker. One of the most notoriously weak areas for many dancers (of all genres) is in the hip. My chiropractor taught me these strengthening and stabilizing the hips.
The first is to strengthen the calves. Stand on a staircase and lightly hold the railing, stand on one step with the toes and ball of both feet on the stair itself. Raise both feet to releve’ position, hold for sixteen counts, then as slowly as possible, lower the feet so that the heels are pointing downwards, towards the next lower step. Repeat at least four times. This will strengthen your calves and give a nice stretch to your hamstrings, too.
For he second exercise on the stairs, turn sideways to face the railing, holding it lightly, keeping the knees soft. Keep one foot on the step itself, and slowly lower the other foot towards the next step. If this is difficult, your hip is weak; you also might notice that one side is stronger than the other. Repeat the exercise on both sides at least four times initially, building slowly towards eight, then twelve repetitions.
Find Your Weight Placement For Turning Practice each turn in its most basic form; even if you think you’ve mastered it already. This will help you with the “intention” of the turn, and burn it into your muscle memory. Do the turn in slow motion on flat feet, planting each foot firmly down onto the floor before taking the next step. Next, do the same thing, but with your eyes closed. After you’ve repeated these movements a few times, do the turn full speed and you should notice a marked improvement.
Engage Your Core While Turning While we perform or rehearse, we are in dance posture: spine elongated, abs engaged, ribcage lifted, shoulders back and down. But sometimes in class or during solitary practice, we forget our posture because we are so focused on mastering technique. In order to execute a great turn, keeping dance posture is essential…and that includes keeping your core tightly engaged. This will provide you with far better bodylines, and provide an essential center of gravity.
Learn To Spot Spotting keeps the dancer’s eyes and heads oriented in a certain place to alleviate dizziness and to enhance control during turning. The way it works is that a fixed focus for the eyes will help you to keep control and retain your balance. While the actual turn is happening, the dancer’s body will rotate at a certain speed… but the goal of spotting is to have the head actually get through the rotation a little more quickly, in order to control the direction of the turn or series of turns.
Spotting is simply the act of focusing on a certain spot while turning. To practice spotting, pick a location on a wall or the studio mirror, and practice turning very slowly, beginning and ending each turn with your eyes on the place you’ve picked as your spotting point.
If you practice these techniques, your turns should show a marked advancement in a fairly short time.
Happy dancing!
#
Come say hi to me on the Inter-Webs!
www.princessfarhana.com www.pleasantgehman.com
www.facebook.com/pleasant.gehman
www.facebook.com/princess.farhana
www.twitter.com/PrincessFarhana
www.instagram.com/princessofhollywood

Purchase a signed copy of The Belly Dance Handbook here: http://www.princessfarhana.com/shop.htm
July 26, 2016
CAMOUFLAGE 101: HOW TO HIDE TAN LINES AND LOOK GREAT IN YOUR COSTUMES
You put on your favorite costume, the one that always makes you look and feel amazing, but like a slap in the face, you suddenly realize you can’t possibly wear it. It’s not because the hooks need to be replaced or you’ve gained or lost a few pounds, and certainly not cause you dribbled some form of condiment while scarfing down a post-gig meal backstage.
It’s because your summer wardrobe doesn’t match your dance costumes!
Maybe you wore a halter-top this past weekend and your SPF wore off. Your chest and midriff are now evenly tanned… but the tops of your boobs look like two giant glow-in-the-dark white Hostess Cakes. Or perhaps you got a sunburn while wearing that Kendall & Kylie “celeb style caged harness” swimsuit from Top Shop…and now there’s such an insane network of pink lines on your torso, it looks like you’ve contracted a hideous tropical skin condition!
If you’re not religious about using sunblock -and you damn well should be- you’ll wind up with a tan or a painful burn. But even if you’re careful about using sunblock, you can still get those pesky tan-lines. And believe me, they look like absolute %@$# on stage!
I am super-anal about wearing sunblock, but because of my mixed heritage and olive skin, I tan in a heartbeat, no matter what. Seriously, I can take out the trash in the early morning, and by the time I get out of the shower fifteen minutes later; I’ve got stripes across the tops of my shoulders from my tank top.
Hey, it’s summer; we’ve all been there.
But let’s get you back into your favorite costume, shall we?
To get rid of tan-lines quickly, first thing you need to do is exfoliate, cause it gets rid of all the dead cells on the surface of your skin. Exfoliating will literally buff away a bit of your tan, and it’ll keep your skin looking fresh and dewy, too.
Please note that this works only for those who are tanned, not burned. If you’ve got a sunburn, it’s an absolute must to let it heal to the point where it’s not painful or tender, because you don’t want any scarring to occur. Instead, slather the burned area with Aloe Vera gel. Straight from the plant is best, but there are also plenty of gentle commercial formulas on the market, too. Take an aspirin or two, stay out of the sun and let your skin heal for a few days before exfoliating. A nice all-natural spray to relieve sunburn pain is black tea. Brew up a strong pot of black tea, let it cool in the fridge and transfer it into a spray bottle. Spritz the cool mixture on your skin after you bathe or whenever you want. The misted tea is refreshing and calming to the sensitive sunburned areas. But black tea also contains a high amount of tannic acid, which will help fade the marks on your body quickly.
But back to exfoliation: I recommend Oil Of Olay Exfoliating Body Wash or St. Ives Purifying Sea Salt Body Wash. Both are terrific, inexpensive options, plus they’re under ten bucks at most chain drug stores like Target, CVS, Rite Aid or Walgreens. If you wanna splurge a bit more, try Guyton Exfoliating Body Wash. It’s available on from www.glytone-usa.com or from Amazon; some department or beauty supply stores carry it, too. The glycolic acid isn’t a chemical peel, it’s easy on your skin, but helps your cells to shed and your skin to rejuvenate faster.
To make an ultra-cheap (but very efficient) D.I.Y exfoliating scrub, get a large glass bowl and add in these ingredients: a tablespoon of sugar with one cup of baking soda and half a cup of water. Mix it well, until it becomes a thick paste. Bring it into the shower with you, and with bath mitts or your bare hands, glob it onto your skin, scrubbing in long strokes or small swirls (your choice, just as long as your hitting the affected area) like your damn life depended on it.
Once you’ve exfoliated, now it’s time to camouflage those hellish tan lines. If you’re skin is medium, olive-toned or dark, get a matte bronzer in a shade that’s a close match your actual skin tone; a shade or two darker is fine. If you’re fair, a rosy pink ought to work well. Just make sure you don’t use pearly or metallic shades- it won’t look natural and will only draw attention to your “disguise”. You can use cream or powder, whichever you prefer, both are fine. With a small soft dome blush brush – or even a cotton ball- dab the product onto the lighter area, but then blend it out onto the tanned area as well. If you apply the makeup only on the un-tanned skin, instead of hiding the tanning marks, it’ll make them look way too obvious.
After you’ve applied the product, make sure to set it so it won’t rub off on your fancy costume. There are several makeup-setting sprays available. One of my go-to fixers is Ben Nye Liquiset, which is a theatrical makeup sealer in a spray pump. It’s pretty inexpensive and really keeps any pigments in place, even when sweaty from performance. However, aside from Amazon, it’s usually only available at costume/theatrical stores and some beauty supply places. There are drugstore brands that work just as well, such as L’Oreal Infallible Fixing Mist or Urban Decay Chill Cooling And Hydrating Makeup Setting Spray. All of these products are made to be worn on the face, but they work just fine for tan marks on the body, too. None of them crack or smudge, and they come off with whatever sort of makeup remover you use also.
My very favorite camouflaging product, which I use with or without tan lines, is Sally Hanson’s Airbrush Legs. It used to come only in a spray, but now, they’ve added a cream formula as well. This stuff is pure magic- it makes you look like the best filters on Instagram! It stays much better than any self-tanner, never looks streaky, doesn’t cake, and really lasts on stage, even through multiple performances. It gives your skin a gorgeous look, truly like you’ve been airbrushed. I’ve used it to hid bug bites, bruises, and scratches from my kitties, and even to completely hide my tattoos! Let it fully dry before you put on your costume, though. After it sets, it won’t rub off on anything. The only other thing you need to know is that if you’re using the spray, it would behoove you to use it in the shower, cause it could stain clothing (or a carpet) and it’s kind of smelly to use in a dressing room. However, the smell goes away as soon as the product dries. Also, sometimes it stays on the skin for an extra day or two, even after bathing… but who doesn’t want to look airbrushed, right?
These tips will allow you to have fun in the sun, but still look great onstage- tries them out and sees for yourself.
#
Come say hi to me on the Inter-Webs !
www.princessfarhana.com
www.facebook.com/pleasant.gehman
www.facebook.com/princess.farhana
www.twitter.com/PrincessFarhana
www.instagram.com/princessofhollywood
 photo: Dusti Cunningham, graphics: Natasha Vetlugin
For more cosmetic tips, purchase my double-disc instructional stage makeup DVD “Bombshell” or a copy of "The Belly Dance Handbook here: http://www.princessfarhana.com/shop.htm
 photo and graphics: Maharet Hughes/Graphic Vibe
July 10, 2016
CONTOURING FOR STAGE MAKEUP
 Believe me- that jawline, cheekbones ( and my cleavage) were NOT given to me by Mother Nature...just sayin'!
Photo by Maryann Bates
Contouring has always been around, but suddenly it seems to be all the rage. The shading and highlighting techniques that were once the sole realm of high fashion photo shoot-shoots or drag queens- have practically gone viral- suddenly; everyone is chiseling, shaping and molding their features as part of their every day makeup application. All the major cosmetic lines have introduced contouring kits, and every inexpensive drug store or knock-off brand has followed suit.
With the right colors and a little practice, we all can have higher cheekbones, a defined jawline and a longer- or shorter, or narrower nose.
But contouring for the stage is a very different animal than just adding a little boost to the face that your gene pool gave you.
To begin with, you must understand - and most of you already do- that strong, bright stage lighting will wash out every one of your features. Seriously, if you’re thinking of wearing daytime (or even party-time/clubbing make up) on stage, your face will appear blank and washed out in performance.
You need to pile on everything from lashes to lip color…and even then, it might not be enough! Trust me: when done properly, stage makeup contouring will look downright horrifyingup close, but under the hot lights, you’ll look like a perfect Grecian statue.
Though it’s always fun to get new make up, you really don’t need any special contouring kits for this. Often, you can find the perfect shades among the cosmetics you already own! Go ahead and splurge on Mac, Anastasia Of Beverly Hills or or Kat Von D if you want to, but it’s totally not necessary to get the look you’re after. It really doesn’t matter at all if you’re using an eye shadow to sculpt your cheeks- it’s only the color that counts!
However, I will say that while cream formulas work fine for every day contouring, for the stage you’ll probably want to use powders or pressed pigments - they stay better, last longer, and are much easier to work with when building your performance look.
First, you’ll highlight areas you want to bring forward, like the planes of your cheekbones, the tip of your nose, the jawline, and the inside corners of your eyes. For day-to-day make up, depending on your skin color, you’d be using a matte ivory or maybe a very light raised gold or bronze color for darker skins.
Onstage, you can use matte shades to highlight, but frosty shades look much better, because they attract and refract light. What might look over-the-top and…yeah, kind of…crazy in real life will be just right for a large stage! Depending on your skin tone- and the effect you want to project in performance- you can use any color for your highlights, from bright pearly white to lavender, light pink (or even baby blue) to metallic like bronze, silver or gold. With a fluffy brush, get a load of pigment on your brush, and tap or blow off the excess. Then go to work on any features you’d like to bring forward.
 I used a light blue highlight on my temples and cheekbones Swirl the frosty highlight color on the tops of your cheekbones, working it all the way into your temples. Dust a faint line down the center of your nose, and lightly around your jawline- not underneath it, but right along the jawbone itself. Blend all of these areas a little but not too much-remember, you’re doing this for the stage, not every day life! Onstage, we want our features to pop, in order for them to look “natural”.
With a fine-tipped brush, use the same frosty shade to draw a thin pearly area just under your eyebrow and the brow bone itself. Dab in some “eyelights” at the inside corner of each eye. This will give a gorgeous, wide-eyed affect, really opening up your eyes-no matter what size they are. To do this, use a Q-tip, placing it just above your tear-ducts and slightly into the side of your nose. Just load the cotton swab with pigment, blow or tap off the excess, and place a precise dot of highlighter at the inside corner. This doesn’t even need to be blended. It will look quite odd up-close but the illusion onstage will look fantastic. If you want to exaggerate the wide-set, doe-eye look, bring the color up the inside of the eye to the eyebrow, blending it into your eye shadow.
For all the areas you want to recede, you will use a matte color. Do not use pearly or frosty cosmetics for shading, because they attract light, and you’ll be using your contouring colors on the specific areas you want to appear to be shadowed. Once again, there’s a wide range of colors that can be used for shading, depending on skin tone. Pick out colors that are about two darker than your own complexion. Darker skinned gals can use anything from a matte medium to a chocolate brown; olive-skinned dancers should use a taupe or dark beige, and a slightly rosy brown or even a brick tone will work well for those with fair skin.
Use the same size brush (or a slightly smaller one) than the one you used for highlighting to dust on a darker contouring shade to the places you want to recede. The shadowed areas will usually be just under the places you’ve highlighted, such as underneath the natural cheekbones, and under the jawline, from ear to ear. When working on the jawline, make sure to dust the contour shade all the way from the center of the neck to past your earlobes, and all the way to the bottom part of the tip of your chin. To make a wide nose appear narrower, apply a thin line of the shading tone up each side of the bridge, blended well. To make a long nose appear shorter, dust some of the contour shade under the tip of your nose, again blended thoroughly. With a clean dome brush, make sure you buff out and blend the shadowy parts- because you want to look like a chiseled goddess, not a trashy 1980’s Mall Rat!
If you want to make your lips look fuller, you can contour them, too. This time, you’ll be using your lipstick and lip pencils. To give the illusion of a pouty lip, a darker lipstick on the top lip, and fill in the lower lip with a color in the same family, but one or two shades lighter. If you want your lips to look lush and bee-stung, start out by lining them with a flesh tone or white pencil. This will bring out your natural lip-line and make it look more pronounced and prominent. Next, use just one shade for the top and bottom lips- a true red with blue undertones works best and has the added bonus of making your teeth look whiter, too. After you’ve applied the color, blot it, apply a second coat, and take a finger full of frosty white, light pink or gold powder and smudge it into the center of the lower lip. Bingo- better than having “work” done and your lipstick will stay put through your performance without smudging!
These same face contouring techniques can be used to highlight your body, especially when wearing costumes that show a lot of skin, to accentuate your muscles and curves. It’s a pretty simple process: whatever body part is lighter will stand out, and those that are darker will recede.
With a full, fluffy brush, apply a thin-ish stripe of pearly white, pinkish bronze or golden highlighting powder down the center of the arms and legs to make them look longer. While you’re at it, dust some of the same powder around the curves of your shoulders, and lightly across the tops of the breasts to make them appear fuller and more prominent. Drawing a soft, smudged line in the center of your cleavage will accentuate it and make it seem deeper. Make sure the actual line isn’t visible- blend it very well- you can even dust on a coat of translucent powder over the highlighter and contour colors instead of blending it. Since your arms, legs and torso are much larger areas than your face, you don’t need to be quite as careful with the blending.
Play around and experiment with these applications, and with the colors you use, then snap a selfie or two to see what looks best on you. With a little practice, you’ll get these looks down to a science!
#
For even more make up tips, purchase my instructional how-to stage make up DVD “Bombshell: Dramatic Looks For The Stage, Photos and Glamorous Occasions or “The Belly Dance Handbook here: http://www.princessfarhana.com/shop.htm
 Bombshell: Dramatic Makeup For The Stage, Photos And Glamorous Ocsaisions, instructional stage makeup DVD
Photo by Dusti Cunningham
August 1, 2016 I'm teaching a 1970's retro stage makeup look as part of the "LA Legends Of Belly Dance" intensive. Info here:
www.dancegardenla.com
Come say hi to me on the Inter-Webs!
www.pleasantgehman.com
www.princessfarhana.com
www.facebook.com/pleasant.gehman
www.facebook.com/princess.farhana
www.twitter.com/PrincessFarhana
www.instagram.com/princessofhollywood
June 14, 2016
FINE FEATHERED FRIENDS: MAINTAINING FEATHER FANS, DANCE COSTUMES AND HEADDRESSES
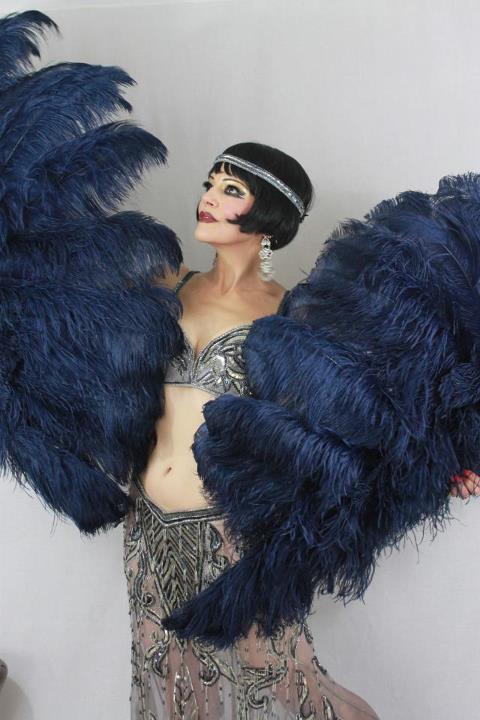 Photo by Lapis
Feathers look absolutely sensational onstage.
Whether you’re using huge Sally Rand fans, rockin’ a lusciously fat boa, or wearing a costume and/or headdress trimmed with feathers, they always look glamorous and amazing. The plumes waft through the air looking elegant and ethereal or flirtatiously accent every shimmy. They also make the audience swoon like nothing else. But beautiful plumed costumes, props and accessories are also expensive….so you should definitely know how to maintain them!
The first thing you need to know is that plumes pick up oils from your skin quite easily. Our natural sebaceous oils will adhere to the feathers and attract more dirt. Always wash your hands before using your fans or wearing your boas; please don’t wear any oily body lotions when using these props. And remember: lip gloss is literally The Kiss Of Death onstage – not just cause it will mess up your feather props and costume pieces, but because you’ll spend the entire show spitting errant fluff out of your mouth!
Here are some tips on maintaining your feather props and costume pieces:
Feather Fan Storage Store your large ( or smaller) plumed fans in one of those long, sturdy locking plastic containers. Rubbermaid makes a terrific, rectangular giant sized one… but you can find several types at places like Target or Walmart, too.
You can easily fit a couple of sets of Sally Rand fans- and more, if they’re smaller- in these without cramping them. Make sure to lay the feathers into the container with the plumes facing up so you won’t break the spines. Before sealing the box for storage, add in cedar chip sachets or plenty of cedar balls to prevent insect infestation- moths adore fans! You can also use good old mothbalss, but I dislike them for two reasons: they stink like chemicals, and more importantly, they’re toxic to pets.
Fan Maintenance Check and if necessary, repair your fans thoroughly before each performance. Keep a Fan Emergency Kit with you in your bag whenever you’re gigging. It should include an extra hex bolt in case the one on the butt-end of your fan blades gets stripped, a tube of crazy glue in case your feathers start releasing from the staves, some pliable craft wire and a jewelry pliers. You’ll also need a “stubby screw driver”- an adorable teensy tool that often comes with both a straight head and a Phillips or star-shaped head. They’re really inexpensive and even come in bright colors like purple, pink and aqua
Fan TransportationI have a specially made carrying case for transporting my Sally Rand fans to local gigs, but a long, wide document tube or Fed Ex box would work just as well! For air travel, your fans will undoubtedly need to be checked ( they’re usually too long for the storage bins in the cabin) so make sure you pad whatever container you’re using well and include your little tool kit.
Storing and caring for Boas, feathered Costumes And HeaddressesStore your feather boas in the same way you would your Sally Rand fans or smaller feather fans- in a tightly sealed plastic container, with cedar chips to keep moths away. Depending on the size of the boa, you can use abig round container, the type made for large cakes. Coil the boa up like a snake ( a boa snake, of course!) and close the container. Larger boas might not fit into a cake container, so some gals store their boas in round hat boxes. When I do this, then I seal the boa in a large plastic bag with the cedar chips before putting it in the hat box- just to be extra careful about insect infestation.
To store headdresses, I have found that the easiest way is to place them on a Styrofoam wig stand, and pin them securely onto the wig head itself. I then wrap the headdress in plastic wrap, sealing it firmly around the bottom of the wig-head, and store the entire thing on a shelf. Again, throw in a sachet of cedar chips. If your headdress is large, you can also stick an opened-up wire hanger or two into the Styrofoam, to create a “tent”, holding the plastic up so it won’t break or bend the feathers. You might also have to weigh down the bottom of the stand to prevent it from toppling over due to the height and weight of the headdress.
Feather boas and feathered headresses are simply the height of glamour- but since feathers are basically an animal ( or rather, avian) product, they tend to dry out over time and can become droopy or flattened out and limp. To restore your boas to their brand-new fluffiness, you’ll need to care for them and maintain them occasionally. Grab your boa and briskly but gently feathers between your hands. This will shake off any dust as well as fluff up the “nap” of the feathers, making each one look perky again.
You can also clean the feathers on your headdresses the same way- but instead of using your entire hand, fluff each feather individually with your fingers.For a costume that has feathered accents, do the same – just fluff the plumes with your fingers.
Next, steam your boa or headdress. If you have a clothing steamer, hang the boa up by one end and steam it this way, being super-careful not to get the tip of the steamer too close to the feathers- you want the fine mist to cover the boa, but you don’t want it dripping wet! Steam each section of the boa only for a few seconds, until the feathers have opened up. For a headdress, do this while the headdress is sitting on the wig stand.
If you’re cleaning feather accents that are sewed or glued to a costume, use your steamer in the same way.
If you don’t own or have access to a steamer, you can also use a tea kettle or a large pot full of boiling water to steam your boa, holding it horizontally over the pot or kettle, steaming it in sections. For headdresses, make sure to hit only the tips of the feathers with steam- try not to get the crown wet. I do not recommend this method for costumes with feather accents, though.
Be very careful not to burn your hands or fingers- steam is just as hot-if not more so- than boiling water!
Make sure to turn off the flame on the stove burner off while doing this or you’ll be courting disaster… BOAS AND FEATHERS ARE HIGHLY FLAMMABLE!
If you maintain your gorgeous feathered costumes and props well, they’ll look great for years!
#
Come say hi to me on the Inter-Webs !
www.princessfarhana.com
www.facebook.com/pleasant.gehman
www.facebook.com/princess.farhana
www.twitter.com/PrincessFarhana
www.instagram.com/princessofhollywood

Purchase a signed copy of my books “Showgirl Confidential” or “The Belly Dance Handbook” here:
http://www.princessfarhana.com/shop.htm
April 27, 2016
THE CRAZY INJURY OBSESSION ALL DANCERS SHARE...AND WHAT YOU NEED TO DO TO GET OVER IT

If there’s one thing dancers have in common, it’s that we are all absolutely certifiably insane when it comes to injuries. An injury is our worst nightmare. We dread them, we fear them, and many of us ignore them, hoping they will go away. Ultimately, we work through them, but no matter what, we always obsess about them. Though many of us can easily identify the difference between a major acute injury and those that are minor or temporary, we still stress out over the very thought that we are injured… and this leads to obsessive behavior.
Recently, my left knee was acting up. It wasn’t an acute injury, but something that had started slowly and intermittently. An injury that creeps up like this is usually an RSI, or Repetitive Stress Injury, something that occurs over a period of time, due to making certain movements over and over. I was experiencing medial ( inner side of the knee) pain, and I knew it was an RSI, because I dance every damn day. So I iced it a bit and let it rest as much as I could.
But as the nagging discomfort came and went, I went through a series of my own “diagnostic tests”. These included repeatedly standing with my full weight only on the injured leg, as well as going into movements- without an adequate warm up, I might add- just to see if I could reproduce the odd little pops, clicks and twinges of pain that I was getting every so often while I danced.
Let me tell you right now that I am familiar with anatomy- as well as the way my own body feels when it’s working properly as opposed to being injured. But my self-performed “diagnostics” were not only invalid and uninformed as far asreal physical tests go, they were just plain stupid! And even though I knew that, I just couldn’t stop my neurotic OCD behavior. It was like an oddly satisfying nervous tick, kind of like when a little kid loses a tooth and is completely preoccupied with poking their tongue into the raw, tender hole where the tooth had been.
I discussed this phenomenon with several friends, all of whom are seasoned performers and instructors; other belly dancers, ballet, jazz, hip hop, burlesque and contemporary dancers, and guess what?
They all do the same thing!
Maybe it’s just an intrinsic part of our dance-life mania, but it sure isn’t helping in any way, shape or form. At best it causes discomfort; at worst, it can aggravate-and prolong- the injury itself. As frustrating as it may be, you gotta let that injury rest! Quit “testing” it to see if the status has changed in the past ten hours…or ten minutes. As the Beatles said, “Let It Be”. It might be easier said than done, but leaving your injury alone is probably the best thing you can do for it. It’s absolutely vital to understand that you need to baby your injury- at least for a while- if you want it to get better. It’s much more prudent to cancel a few classes or gigs than try to flail your way through your regular schedule while your injury is in full force. R.I.C.E or Rest, Ice, Compression and Elevation are always good; you can ice and injury for fifteen or twenty minutes every couple of hours to help the inflammation calm down. Over the counter NSAIDS will also help with the pain as well as combatting inflammation.
In the meantime, during your recovery, you can work on any areas of your body that aren't injured. To stay conditioned, stretch and strengthen the rest of your body before returning to your full-on schedule of rehearsals, classes and shows. The last thing you want to do is impede your recovery by ignoring the advice of your physicians and/or physical therapist…or by performing any dumb-ass “self diagnostics”.
There are many things you can do to keep learning and to help you feel as though you are progressing, even if you can’t actually dance yet. Ask your instructor(s) if you can audit their dance classes- you can gain insight and learn technique just by watching a class and taking notes. Watch dance videos; analyze the styles or technique you are seeing, and observe more subtle things like stage presence, emotional connection to the music, and the costuming the performing is wearing.
Once you’ve been passed the acute phase of your injury, and with your doctor’s ok, you need to start rehab. If you’ve been prescribed a course of physical therapy, attend the sessions religiously, following your homework exercise regimen to the letter. You might also try Pilates, which was actually designed as a strengthening program to help dancers rehabilitate from injury. Make sure to find a certified instructor and let them know how you are injured. Start out simple, and basic- if you’re feeling pain from any movements, don’t do them yet… and no matter what, don’t push yourself too hard, because you certainly don't want to exacerbate your injury. It’s better to err on the side of caution. Walking is a terrific and low- impact aerobic way of keeping fit, and often a brisk walk will lower your overall physical feelings of discomfort.
If your injury has recovered enough that you have the ability to dance- but aren’t quite at a hundred percent, you will need to make necessary adjustments. However, you need to make sure that whatever you are doing doesn’t throw your body out of alignment. For example, if you’re still unable to completely put your full weight on one leg, do not assume that you’ll be fine bearing all that weight on the other leg! It will only lead to more problems. The more you “protect” the injured side, the more likely it will be that you’ll sustain an injury on the side that’s working over-time.
Try to calm your inner dance-demons while you are recovering, ok? Be grateful for your body’s healing capabilities, have faith in your recovery process, and take the necessary time to recover fully before you get back in the game.
Oh and please… No more “testing”!
#
Get a signed copy of “The Belly Dance Handbook: A Companion For The Serious Dancer” here: http://www.princessfarhana.com/shop.htm
Come say hi to me on the Inter-Webs!
www.princessfarhana.com
www.facebook.com/pleasant.gehman
www.facebook.com/princess.farhana
www.twitter.com/PrincessFarhana
www.instagram.com/princessofhollywood
Pleasant Gehman's Blog

- Pleasant Gehman's profile
- 16 followers
Pleasant Gehman isn't a Goodreads Author
(yet),
but they
do have a blog,
so here are some recent posts imported from
their feed.

