
David Petersen's Blog
September 2, 2025
Saxon & Kenzie
 This is a colored version of an inked piece I did (long enough ago I can't remember if it was just for fun or a commission).
I enjoy getting a chance to go back and color these to add some more depth and clarity while also hopefully making some new process blogposts for you all to see and eventually to be included in a new sketchbook (though I just released on this summer: Axe Wielders which is still available for sale)
Below is the process for creating the illustration as well as coloring the artwork.
 Pencils:
The start of this was done as two separate drawings on different sheets of copy paper of both Saxon and Kenzie. Those were scanned and tinted different colors in photoshop as I digitally blocked in a tree and some leaves (and digitally added some bark detail to the tree). The grass was it's own layer where I had an outline so that each blade of grass I drew already had a hard line around it for clarity. Oh! and I dropped in a 3D model of a sword because I didn't draw one beyond a directional line in the pencils
Working like this allows me to still draw some on paper while also getting the resizing and editing benefits of digital.
 Inks:
Inks:With the layout complete, I printed it out and taped it to the back of a sheet of Strathmore 300 series bristol. On my huion lightpad I was able to see through the surface of the bristol down to the printout to use as a guide as I inked. I inked this with Copic Multiliner SP pens (the 0.3 & 0.7 nibs).
Most of the 'work' in this piece was in the texture of that bark and trying be sure it wasn't overwhelming and had some depth while leaving the forms of the characters clear.
 Color Flats:
The first step of digitally coloring a piece is do establish the color areas with flat colors (a professional version of coloring-in-the-lines). Most of my color choices were already established with the characters themselves and the layout, but I adjusted them at this stage to make the piece more cohesive.
I also established color holds (areas where I want the inked line art to be a color other than black) on the background grass and the leaf veins.

Final Render:
The rendering was all done with the dodge and burn tools in Photoshop with a stock textured brush.
Here my trickiest part was getting a sense the light was coming in from the right on the character as well as a the leaves and the highlights on the bark.
This piece will be included in the next sketchbook out sometime in 2026!


August 26, 2025
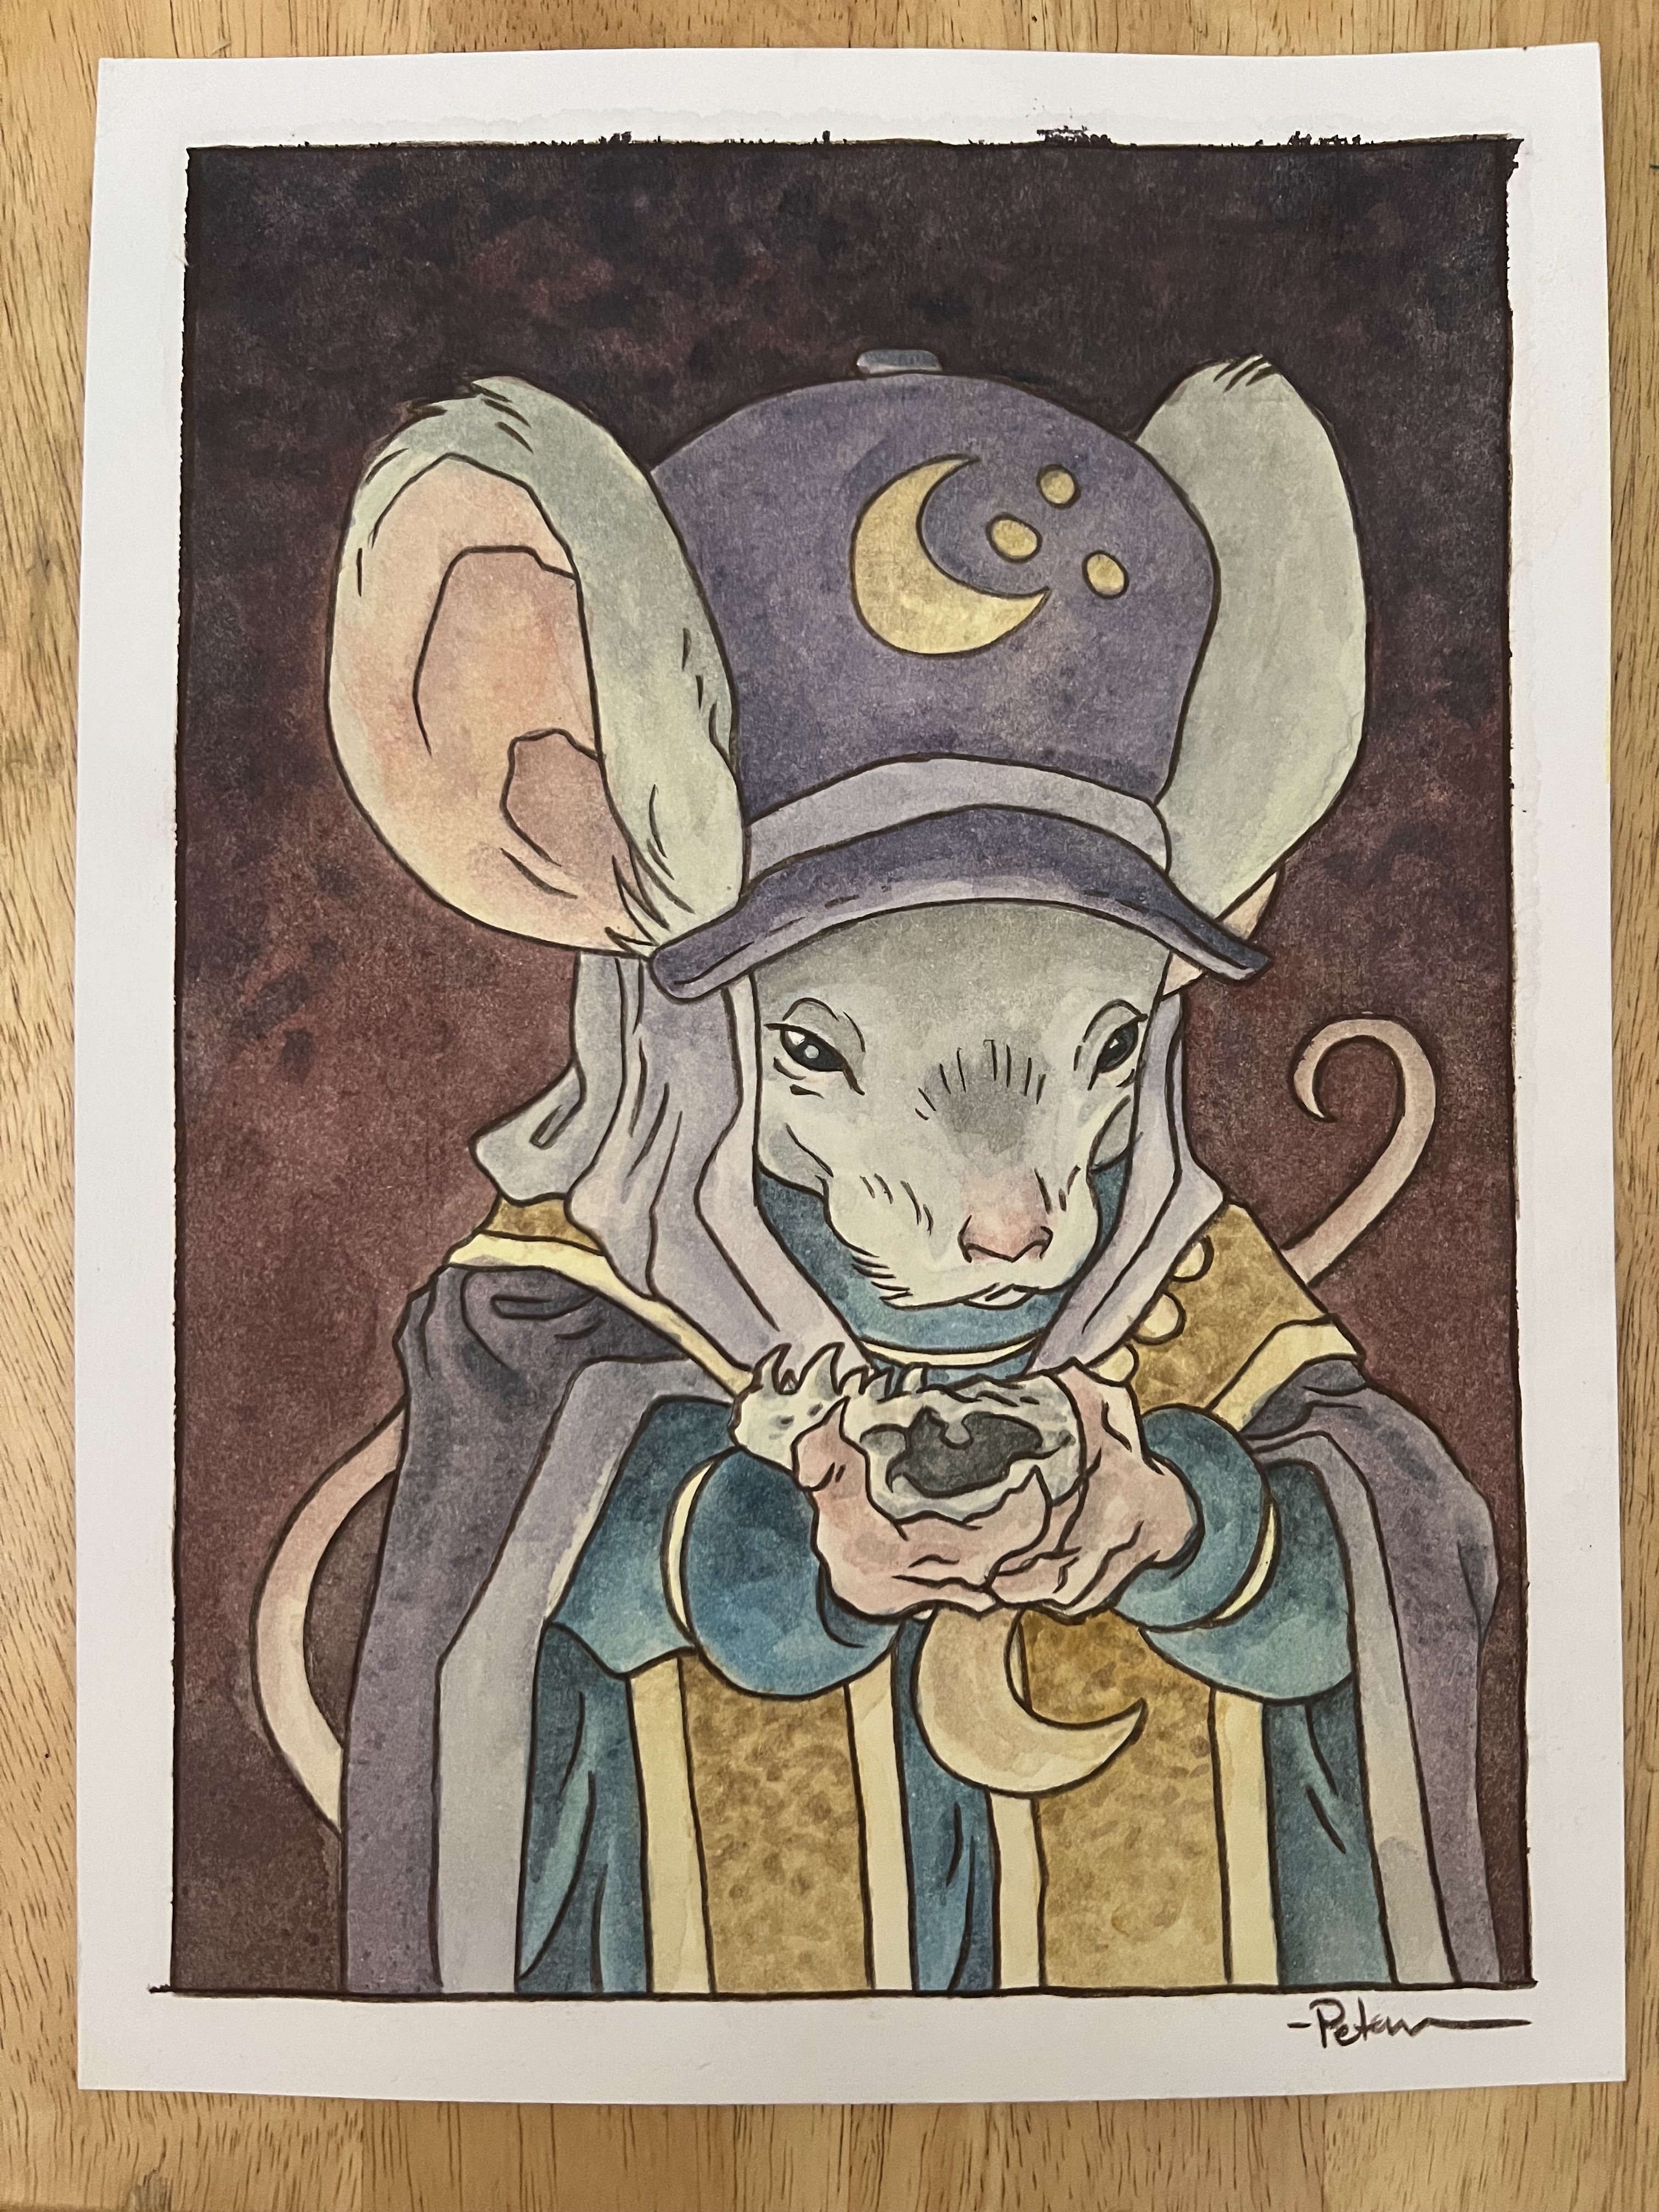
Mouse & Magpie Illustration
 This is a colored version of an inked commission I did for a fan a long while back. The idea was a mouse horder/collector (insert pack-rat joke here) along with a magpie companion.
I enjoy getting a chance to go back and color these to add some more depth and clarity while also hopefully making some new process blogposts for you all to see and eventually to be included in a new sketchbook (though I just released on this summer: Axe Wielders which is still available for sale)
Below is the process for creating the commission as well as coloring the artwork.
 Pencils:
The start of this was done as three separate drawings on different sheets of copy paper. The mouse was drawn first and the magpie was drawn using photo reference. On top of those sheets on a lightpad I drew the mouse's collection of goods. Those elements were all scanned and tinted different color in photoshop and moved and re-sized until it fit well inside the square border of the piece. A quick amount of tan digital painting was done to imply the areas of the tree background and the rocks and stick debris in the foreground
 Inks:
Inks:With the layout complete, I printed it out and taped it to the back of a sheet of Strathmore 300 series bristol. On my huion lightpad I was able to see through the surface of the bristol down to the printout to use as a guide as I inked. I inked this with Copic Multiliner SP pens (the 0.3 & 0.7 nibs). Since this original art is what the fan who commissioned this piece will own, I always want the art to be crisp, clean, and detailed enough to stand on it's own without color.
The original was then shipped off to be with it's owner, but not before I got a good scan of it.
 Color Flats:
The first step of digitally coloring a piece is do establish the color areas with flat colors (a professional version of coloring-in-the-lines). Here the final color palate isn't as important as being able to easily isolate any part of the piece when it comes time to render it (like being able to grab just the mouse's fur or just the cooking pot, or the sword in the magpie's beak, etc)..so while I got the backgound and figure colors close to final in this step, with all the bits of the mouse's collection overlapping each other, I needed to abstract that and just do vibrantly wrong colors to be sure I got everything and enough separation between them all.
 Final Render:
I'll admit, this piece was hard to manage so the viewer could still focus on the characters while being able to get lost in the objects. The rendering was all done with the dodge and burn tools in Photoshop with a stock textured brush. I forgot to mention on the step above, I added a color hold (where I want the ink lines to be a color other than black) to the trees in the background as well as the ground as it recedes into the background on the left.
This piece will be included in the next sketchbook out sometime in 2026!
August 19, 2025
Dawn of the Black Axe Hardcover
 Dawn of the Black Axe, the three issue Mouse Guard mini series about the first wielder of the Black Axe is coming out in hardcover in early 2026. The miniseries was written and colored by me and drawn by Gabriel Rodriguez (Locke & Key).
To Pre-Order: https://www.penguinrandomhouse.com/books/813486/mouse-guard-dawn-of-the-black-axe-by-david-petersen/
For the hardcover collection, I did all of the book design and asked Gabe to do a new illustration for the cover. Here you can see the final cover design, but below I'll walk you though the process Gabe & I went through to create it.
I sent Gabe some reference and a sketch of the type of image I though the cover needed. Specifically Bardrick with the Black Axe (referencing an old print of mine and a panel of Gabe's from the book) along with the concept of some kind of knot of the five snakes behind him.

Gabe was worried about making the background too chaotic and unreadable and opted for a more geometric and stylized version of the snakes (he told me he was inspire by Thulsa Doom's symbol from the Conan movie). Here are his pencils:

Gabe then inked the artwork in his expert way of knowing how to play with line weight and pattern. And he sent over a high-res scan.

I then did the color flatting on the piece establishing flat colors for everything and also creating color holds (areas where I want the linework to be a color other than black) on the snake circle and then on all of their eyes. Most of the color choices were established in the issues already I needed just to sample them.

The final colors were done using the dodge and burn tools in Photoshop to render shadows and highlights and add some texture with a stock brush.

August 12, 2025
Dawn of the Black Axe Cover Roundup
With all issues of Mouse Guard: Dawn of the Black Axe now released (and a hardcover due out early next year) I wanted to look back at all the covers and share the process art posts about each of them and celebrate the work Gabriel, Goni, Derek, Walter, Kevin, Matt and I did for this mini series.
ISSUE #1
 Gabriel Rodriguez:https://davidpetersen.blogspot.com/2025/01/dawn-of-black-axe-1-rodriguez-cover.html
David Petersen:https://davidpetersen.blogspot.com/2025/02/dawn-of-black-axe-1-petersen-cover.html

Goni Montes:https://davidpetersen.blogspot.com/2025/06/dawn-of-black-axe-1-montes-cover-process.html

Derek Laufman:https://davidpetersen.blogspot.com/2025/05/dawn-of-black-axe-1-laufman-cover.html
 Walter Simonson:http://davidpetersen.blogspot.com/2025/07/dawn-of-black-axe-1-simonson-sdcc-cover.html
ISSUE #2

Gabriel Rodriguez:https://davidpetersen.blogspot.com/2025/03/dawn-of-black-axe-2-rodriguez-cover.html
 David Petersen:https://davidpetersen.blogspot.com/2025/03/dawn-of-black-axe-2-petersen-cover.html
 Kevin Eastman:https://davidpetersen.blogspot.com/2025/03/dawn-of-black-axe-2-kevin-eastman-cover.html
ISSUE #3

Gabriel Rodriguez:https://davidpetersen.blogspot.com/2025/04/dawn-of-black-axe-3-rodriguez-cover.html

David Petersen:https://davidpetersen.blogspot.com/2025/04/dawn-of-black-axe-3-petersen-cover.html

Matt Smith:https://davidpetersen.blogspot.com/2025/06/dawn-of-black-axe-3-matt-smith-cover.html
August 5, 2025
Recent Sketchcover Commissions
Here are some of the recent Sketchcover commissions I've done at Heroes Con & SDCC


July 29, 2025
Lieam with the Black Axe
 For my new Sketchbook 'Axe Wielders' I created a new illustration of Lieam with the Black Axe and a runic 11 (as he is the 11th wielder of the ancient weapon).
I know fans have been long waiting for a story that takes place after the Winter storyline, so seeing this illustration of Lieam must feel like a tease, and for that I apologize and thank you for your patience.
Below I'll share the process into making this new piece of art for the sketchbook about all the past wielders of the Black Axe.
 It started with a loose sketch of Lieam with the axe that I scanned and color blocked in Photoshop. There's a bit of a homage here to Sean Rubin & Alex Kain's Legends of the Guard story, so I then looked at a lot of photos of bears until I found one that would fit where it looked like it was behind him, but also shrunk down enough to fit in the frame.
 I did a draw-over that photo to get a pencil version of the bear's key points I needed to include.
As you can see below, I opted to cover over much of the bear with a stone den opening and also included ferns (barely visible here).
 With a printout of the above rough (and perhaps a bit more work done on that stone den and fern leaves) I taped it to the back of a sheet of Strathmore 300 series brisol. On my Huion lightpad I was able to ink the piece seeing through to the printout to use as a guide.
 I used Copic Multiliner pens (the 0.7 nib mostly) to ink the piece. With all of Lieam's bracken cloak, lineweight had a lot to do with making sure the image was readable. I also used more texture on the fern leaves to help differentiate from the more open bits of Lieam's cloak and the bear's fur.
 When the inks were finished I scanned them and started the coloring process. That first step is all about establishing flat color areas (known as flatting) with no lighting or texture. A professional version of coloring-in-the-lines.
Most of the color choices were straightforward, though I did have to play a bit to get something that worked in color harmony as well as value-play.
At this step I also established color holds (areas where I wanted to linework to be a color other than black) and did so for the runic number (and later the bear's eye)
 Here again is the final rendered artwork included in the new sketchbook.
The colors were finished using the dodge and burn tools in Photoshop with a stock textured brush to add shadows and highlights.
 The Mouse Guard sketchbook 'Axe Wielders' is available in my online store:
mouseguard.bigcartel.com
July 22, 2025
Farrer Forging the Black Axe
 For a new Mouse Guard Sketchbook titled 'Axe Wielders' about the past wielders of the Black Axe, I created a new piece of Artwork of Farrer forging the ebon blade itself.
 Axe Lore was fresh in my mind from the Dawn of the Black Axe mini-series Gabriel Rodriguez and I did together, and it felt only fitting that rather than feature one wielder above another for the cover of the sketchbook, I'd show Farrer creating the mythic weapon.
The sketchbook debuts at SDCC this weekend, but will be available in my online store shortly after. And below is more info about the process of creating the artwork.
 Pencils started with a drawing of Farrer himself with his hammer and tongs. I watched a few blacksmithing videos showing axe forging to get the idea of how the Black Axe would have been made. His Hammer and tongs were designs I'd made long ago (and Gabe used in Dawn of the Black Axe for one flashback panel)
Other drawings of the anvil, the axe's barley-twist handle, and Farrer's shop were assembled together in Photoshop (in fact I took a few stabs at the shop environment before I was happy). The Celtic knot-work around the forge was inspired from the illuminated page from Fall showing a stylized illustration of this same scene.
 With the above pencils in shape, I printed them out and taped them to the back of a sheet of Strathmore 300 series bristol. On my Huion lightpad I was able to see through the surface of the bristol down to the printout to use as a guide while I inked. I used Copic Multiliner SP pens (the 0.7 nib mostly).
The texture is mostly in the environment around Farrer and his linework is fairly open. What felt odd to me as I inked this was leaving so much of the normally almost entirely inked in axe open for the lighting effects of the forge glow and the hot ore being hammered.
 When the inks were finished I scanned them and started the coloring process in Photoshop. The first step of digital coloring is establishing color areas with flat colors (this process is known as 'flatting') and is basically a professional version of coloring-in-the-lines.
With so much of the environment being about lighting and glow that would be added via painting and rendering later, the flats were very hard to make look right––just base colors. At this stage I also established color holds (areas where I want the linework to be a color other than black) on Farrer's tears, the coals, flame, glow, water ripples, and the hot axe head.
 The last step was to render the piece. Normally most everything I do in this step is with Photoshop's Dodge and burn tool, but for so many of those glow transitions I used a paintbrush to softly blend in my color transitions.
The dodge and burn tools with a stock texture brush still did do a lot of the heavy lifting to add shadows and highlights with some pebbly texture.
 The Mouse Guard Sketchbook 'Axe Wielders'will be available in my online store shortly after I return from SDCCmouseguard.bigcartel.com
July 15, 2025
SDCC 2025!
 San Diego Comic Con is next weekend! I'll have a 10' x 10' booth #4606 full of Mouse Guard Hardcovers, RPGs, Sketchbooks, Prints, Tees, Stickers, Single Dawn of the Black Axe issues, Original Art and more. 2025 is the 20th anniversary of Mouse Guard which means this SDCC is the anniversary of where I walked up to the Archaia booth and showed Mark Smylie my self-published issue.
 Signatures are always free (other than on MtG cards–which are $5 per card) on anything you buy from me -or- brought from home.
Julia and I will be joined by our niece Kate and my best friend Jesse (real-life Kenzie) to help with transactions and keeping the booth stocked.
Below is more info about where to find me and some special things I'll have at the show.
 Booth 4606 Inside lobby F
 The BOOM! Booth 2229 will have this SDCC exclusive
 Walter Simonson Dawn of the Black Axe #1 cover
Friday at 12:30PM I'll be doing a signing there for this cover.
 A new Mouse Guard Sketchbook featuring illustrations and text about all of the past wielders of the Black Axe.
(These will be available in my online store shortly after we return from SDCC)
 Original watercolor paintings of Bardrick and Siobhan from Dawn of the Black Axe will be available for sale. Each is 9" x 12"––and it's rare for me to offer watercolored illustrations these days
 Original inks for the 20th Anniversary print (I'll have the prints available at SDCC as well)
This piece will be framed and available for purchase.
And while this is a photo from last year,
I suspect the booth setup to look similar to this for you to keep an eye open for:

July 8, 2025
Dawn of the Black Axe #1 Simonson SDCC cover
 Mouse Guard: Dawn of the Black Axe issue #1 had several Variant covers, but while the issue has been out for a few months––you probably have not yet seen this cover by the legendary Walter Simonson!
Walt has always been kind and supportive of my work and Mouse Guard, so I was thrilled when he agreed to do a cover. It will be released at SDCC as an exclusive.
Walt was gracious enough to share steps of his process below and I also wanted to show my colors on his work as well.
Pencils:

My editor shared this drawing Walt provided with the note that Walt would like for his drawing of the Black Axe in this cover to be the axe going through the logo instead of the standard one on the other covers. I agreed to do some editing work on the logo image and he could proceed.
Inks:
 I don't know what Walt inks with these days, but I know he's been a fan of technical or drafting pens in the past. I was provided with this scan to work with for the colors and logo alignment.
Flats:
 In this step I was just about placing flat color in the color areas (fur, cloak, helm, grass, tree, etc) as well as establishing color holds (areas where I want the ink lines to be a color other than black) on the sunburst and rays, and where they overlapped Bardrick's ear.
Color:

Most of the cover was rendered out with a combination of a soft paintbrush and the dodge and burn tools in Photoshop. I've come to find out after now coloring Dawn of the Black Axe work for Gabriel Rodriguez, Kevin Eastman, and Walter Simonson, that I have to approach the tools and color dynamics differently with each. I found that less of my normal rendering was needed on Walt's inks and just more soft color transitions and then slight hue/saturation/value changes on any little area formed by his ink lines (almost like stained glass panels)
Final Cover:
 Here again is the final cover with that logo modified so Walt's Black Axe weaves through like the original.
This version will be available at SDCC exclusively (though if there are extras at the end of the event, I may have some for my online store)
July 1, 2025
Bardrick & Siobhan Paintings
 Last week I posted about a Saxon watercolor piece I donated for Parkinson's Research, but if you missed out, I did two more Mouse Guard watercolors I'll be taking with me to SDCC this month for sale (and if they don't sell there, will be in my online store soon after).
These 9" x 12" paintings are inspired by characters from Dawn of the Black Axe, the latest Mouse Guard comic mini series written and colored by me, with art by Gabriel Rodriguez.
Below is a bit of behind the scenes process (I wish I had been better about photographing steps along the way, but must have forgotten) and clearer images of the final pieces.
The Bardrick piece started with a pencil drawing (based on a panel of Gabe's from issue 2). That drawing was then taped to the matboard the final painting would be on with graphite transfer paper sandwiched in between. By tracing over the original pencils with a pen (as seen here), the lines transfer over to the matboard.

The final painting of Brarick, first mouse to wield the Black Axe with brown color pencil to tighten in the linework.

Siobhan, the Matriarch of the story was the other painting's subject. I did a very quick pencil portrait of her that had several proportion errors, so I just scanned that sketch and started cutting and resizing bit until it felt right. I then did some digital drawing and color blocking to plan a dramatic uplight. The same transfer process was used on a printout of this to get the image onto the matboard.

Here is the final painting of Siobhan, Matriarch & Healer from Dawn of the Black Axe. I really struggled with the watercolor on this matboard. I usually use watercolor paper or illustration board for painting on, but I had some scraps of matboard and though 'what the hell--I've painted on matboard before'...but the board soaked up the water too quickly and just the wetness made every brush stroke look dark like when you get a tee-shirt wet. Because of that I never really achieved the dramatic color and uplighting I was hoping for.
David Petersen's Blog

- David Petersen's profile
- 339 followers

