I’ve been embroidering on and off for over thirty years, ...
I’ve been embroidering on and off for over thirty years, but I’m mostly self-taught and although I’m not a beginner I definitely have a lot of areas where I could improve. I’ve taken a couple of day classes over the years, including some at the Royal School of Needlework, which have been consistently excellent. This week I was on a two-day class there, Screen Printing with Surface Embroidery, taught by Jen Goodwin. Jen did her apprenticeship at RSN and is a regular tutor there. She was also involved in embroidering Kate Middleton’s wedding dress!
RSN run day classes in a few locations around the UK and, I believe, some in the US. But my course was at the RSN headquarters in Hampton Court Palace, which is obviously the coolest place to study:
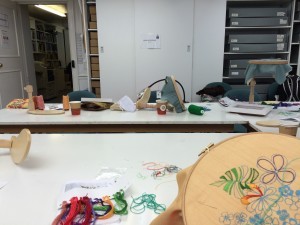
The classroom was up the back stairs in what must have been servants’ quarters. But it had lots of light and beautiful views. It’s a wonderful place to stitch.
There were 7 students in the class, which gave us all plenty of time for individual attention, and we enjoyed our time learning together.
The other fun thing about doing the classes at Hampton Court is that the RSN shop is there. I bought a couple of magazines, a seat frame with hoop, and Trish Burr’s book on colour which looks amazing. The security pass you get while you’re doing the course allows you entry into the palace, so I took a couple of hours after class to visit my favourite rooms and was rewarded by coming across a group of fabric conservators working on William III’s bed. All the covers were laid out, with the three layers of mattresses and pillows, and samples that you could touch to get a sense of how it was all put together. So cool!
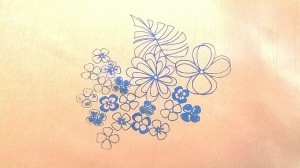
Anyway, back to the embroidery. We began with the screen printing. Jen uses this technique for transferring designs onto fabric for her embroidery kits. The designs we were working with are intended to have some of the printing visible – you can stitch as much or as little as you like. We had three different designs to choose from, and everyone picked their background fabric and ink colour. I love bright colours so I picked a yellow background and teal blue ink. The ink has a beautiful pearlescent sheen which works really well with the dupioni fabric and the sheen of the embroidery.
I love the idea of using screen printing for transferring embroidery designs. I hate tracing designs by hand and I find prick and pounce too much faff. Obviously, it does cost money to get the screens made up, so it’s probably only worth it if you’re using the same design repeatedly – for kits, for classes, possibly for Christmas cards?! You only have to add a small amount of stitching if you want to, so I think this could actually work well for Christmas cards. The other possibility would be to find a friend who does screen printing and borrow their kit (or ask them to print it for you!)
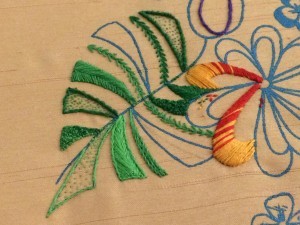
Anyway, we’d all printed our designs, let the ink dry and ironed to fix it by coffee time. So then it was time for stitching. The designs all use similar stitches, so we were all able to work them as Jen showed us how. On the first day we did seeding, herringbone, French knots, stem stitch and Portuguese stem stitch. Of these, only Portuguese knotted stem stitch was new to me, but Jen’s demonstrations and tips improved my technique on all the others. I found the Portuguese knotted stitch a nightmare to get right – I sneakily checked out Mary’s video of it in the evening, so I could have a better attempt at it. The first day’s work was all on the green leaf:
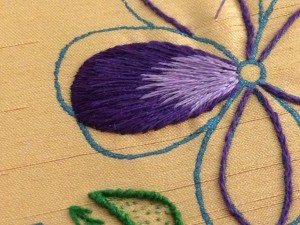
On day two we focussed on just two stitches: padded satin stitch and long and short stitch. I’ve always struggled to produce satin stitch that I was happy with. Jen showed us how to do proper foundation stitching, as well as helping us to work a consistent angle through a shape, and how to use multiple colours in an area of satin stitch. Long and short stitch was the last thing we tackled. Jen helped us to choose colours which would shade well together, and then demonstrated how to work the stitch. She was particularly good at watching and correcting us all as we struggled with our long and short stitch flowers!
Finally, she made sure that we all had sufficient thread and beads to complete our kits at home, and demonstrated the last few stitches which add the small embellishments around the designs. I particularly liked the fact that you didn’t need to bring any tools to the class. If you’re travelling – and one of the students was on a trip over from Canada – that can make a big difference. Everything was provided, including hoops, needles, threads and a comprehensive instruction booklet. It wasn’t a beginner class, but I think we were all glad that she didn’t make any assumptions about what we already knew. The RSN’s ethos is all about passing on the traditional ways of stitching, so there are no short cuts here! In fact, we all said how helpful it was to be shown the right way of doing things, because our results were so much more satisfactory. When books, kits or classes simplify everything for beginners, their work will be disappointing and they’ll get frustrated and give up.
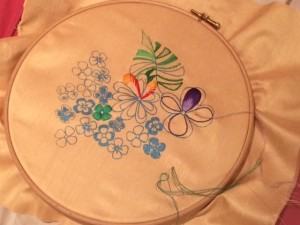
This is my work at the end of the two days:
As you see, I still have plenty to work on at home! But I’m glad to have a chance to keep practising what I learned in the class. And now I’m scanning the 2016 course list to see when I can sign up again!
 newest »
Ros Clarke's Blog
- Ros Clarke's profile
- 31 followers





This is just the kind of information that I had been looking for, Thanks a ton once again, Floor Polishing Company in Dubai